Recent Posts
Everything You Need to Know About Mold in Crawl Spaces
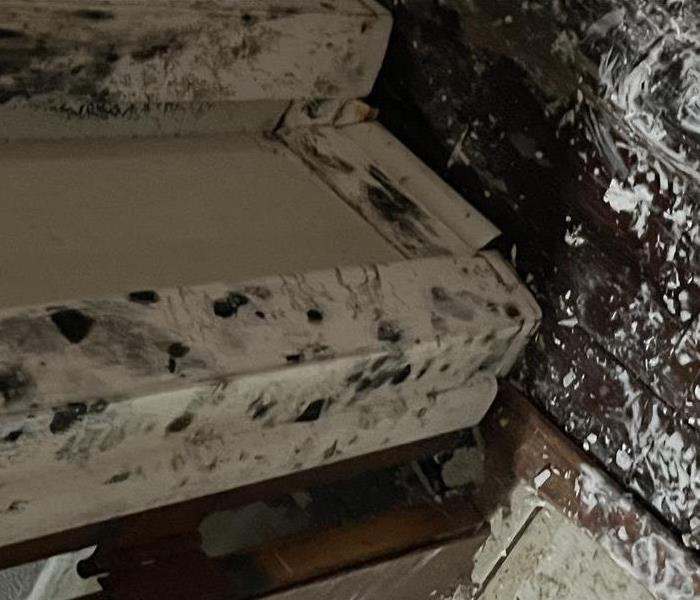
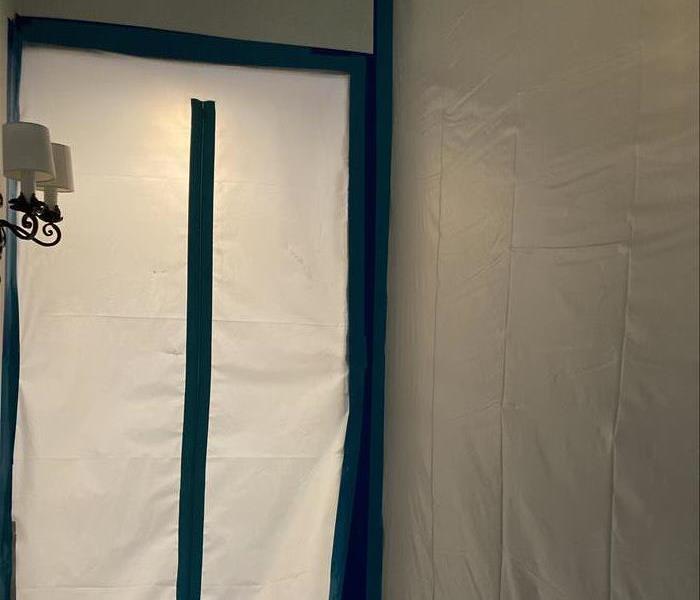
7/17/2024 (Permalink)
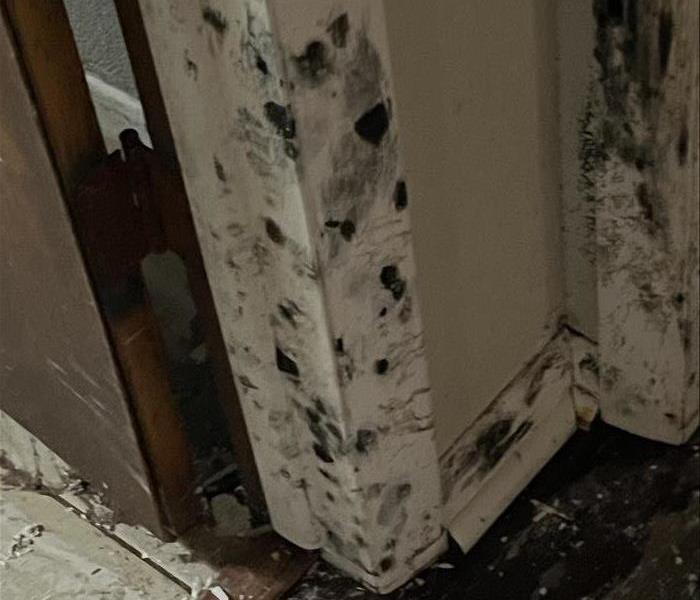 Mold in your crawl space can cause significant property damage.
Mold in your crawl space is a serious problem that can lead to property damage and unpleasant odors in your home. Addressing this issue promptly is crucial to maintaining a healthy and safe living environment. In this blog, we'll explore how mold gets into crawl spaces, how to prevent it, and the steps you can take to remove it if it appears.
How Does Mold Get Into Crawl Spaces?
Crawl spaces are prone to mold growth due to their dark, damp, and poorly ventilated nature. Mold spores can easily find their way into your crawl space through various means, such as:
- Moisture Infiltration
Water can enter crawl spaces through cracks in the foundation, plumbing leaks, or from the ground if the area is not properly sealed. Excess moisture creates the perfect environment for mold to thrive.
- Poor Ventilation
Inadequate ventilation in crawl spaces traps moisture, creating a humid environment that encourages mold growth. Without proper airflow, the area remains damp, providing a breeding ground for mold.
- Organic Materials
Crawl spaces often contain organic materials like wood and insulation, which can serve as food sources for mold. When these materials become damp, mold can quickly colonize them.
Preventing Mold in Crawl Spaces
Preventing mold growth in your crawl space involves controlling moisture and ensuring proper ventilation. Here are some effective strategies:
- Control Moisture
Ensure that your crawl space remains dry by addressing any water intrusion issues. This includes fixing leaks, sealing foundation cracks, and ensuring proper drainage around your home's perimeter. Installing a vapor barrier on the crawl space floor can also help prevent moisture from seeping in from the ground.
- Improve Ventilation
Proper ventilation is crucial in preventing mold growth. Install vents or exhaust fans to promote airflow and reduce humidity levels. Ensuring that your crawl space has adequate ventilation helps to keep the area dry and mold-free.
- Use a Dehumidifier
If your crawl space is prone to high humidity, consider using a dehumidifier. This device can help maintain low humidity levels, making it difficult for mold to grow. Regularly monitor and adjust the dehumidifier to ensure optimal performance.
- Insulate Your Crawl Space
Proper insulation can help control temperature and moisture levels in your crawl space. Use moisture-resistant insulation materials to reduce the risk of mold growth. Ensure that insulation is installed correctly to avoid trapping moisture.
Removing Mold from Crawl Spaces
If you discover mold in your crawl space, it's important to act quickly to remove it. Here are the steps to effectively eliminate mold:
- Wear Protective Gear
Before starting the cleanup process, wear protective gear such as gloves, goggles, and a mask to avoid exposure to mold spores.
- Identify and Fix Moisture Sources
Identify and repair any sources of moisture to prevent future mold growth. This may involve fixing leaks, sealing cracks, and improving drainage.
- Clean the Affected Area
Use a mold removal solution to clean the affected areas. You can use a mixture of water and detergent or a commercial mold cleaner. Scrub the moldy surfaces thoroughly to remove all traces of mold.
- Dispose of Contaminated Materials
Remove and dispose of any contaminated materials such as insulation or wood that cannot be cleaned effectively. Replace these materials with mold-resistant alternatives.
- Dry the Area Completely
Ensure that the crawl space is completely dry after cleaning. Use fans or dehumidifiers to speed up the drying process. Properly drying the area is crucial to prevent mold from returning.
- Monitor and Maintain
Regularly inspect your crawl space for signs of moisture and mold. Implement preventive measures and conduct routine maintenance to keep the area dry and mold-free.
Mold in your crawl space can cause significant property damage and create an unpleasant environment in your home. By understanding how mold gets into crawl spaces and taking proactive steps to prevent it, you can protect your home and ensure a safe living space. If you discover mold in your crawl space, act quickly to remove it and address the underlying moisture issues. For professional assistance, consider contacting a mold remediation service like SERVPRO® to ensure thorough and effective mold removal.
Roof Leaks and Water Damage: Inspection and Repairs
6/12/2024 (Permalink)
 Our team is on top of the inspection and restoration process after roof leaks and water damage!
When it comes to protecting your property from water damage, one of the most vulnerable areas is the roof. Roof leaks can lead to a host of issues, including water damage to your ceilings, walls, and belongings. It is essential to address roof leaks promptly to prevent further damage and costly repairs. In this blog, we will discuss the importance of inspecting and repairing roof leaks to protect your property.
Detection of Roof Leaks
Detecting roof leaks early is crucial to preventing extensive water damage. Here are some signs that may indicate a roof leak:
- Water Stains on Ceilings and Walls: Discoloration or water stains on your ceilings and walls are a clear indicator of a roof leak.
- Dripping Water: If you notice water dripping from your ceiling or light fixtures, it is a sign of an active roof leak.
- Mold Growth: Mold thrives in moist environments and can indicate the presence of water leaks in your roof.
- Missing or Damaged Shingles: Damaged or missing shingles can compromise the integrity of your roof and lead to leaks.
Roof Inspection
Regular roof inspections are essential in identifying and addressing roof leaks before they escalate. A professional roofing contractor can perform a thorough inspection of your roof to detect any signs of damage or leaks. During the inspection, the contractor will assess the condition of the shingles, flashing, gutters, and other components of the roof.
Repairing Roof Leaks
If a roof leak is detected, prompt action is necessary to prevent further damage. Repairing roof leaks involves the following steps:
- Temporary Fixes: In case of an active leak, temporary measures like placing a bucket under the leak can help minimize water damage.
- Fixing Damaged Shingles: Damaged or missing shingles should be repaired or replaced to prevent water from seeping into the roof.
- Sealing Gaps: Seal any gaps or cracks in the roof to prevent water infiltration.
- Repairing Flashing: Damaged flashing around chimneys, vents, and skylights should be repaired to prevent water leaks.
Professional Assistance
While minor roof repairs can be done by homeowners, it is advisable to seek professional assistance for extensive roof leak issues. Professional roofing contractors have the expertise, tools, and skills to identify and repair roof leaks effectively.
Preventive Measures
Regular roof maintenance and inspections can help prevent roof leaks and water damage in the future. Keeping gutters clean, trimming overhanging tree branches, and addressing issues promptly can prolong the life of your roof and prevent water damage.
In conclusion, roof leaks are a common cause of water damage in properties. Detecting roof leaks early, conducting regular inspections, and promptly addressing any issues are key to protecting your property from water damage. If you suspect a roof leak or require assistance with repairing water damage, contact SERVPRO® for professional and reliable restoration services.
Assessing Wind Damage and Its Aftermath
5/15/2024 (Permalink)
 In this blog, we explore how to assess wind damage and navigate the aftermath effectively, providing valuable insights and guidance for homeowners.
Strong winds can wreak havoc on homes and buildings, causing significant structural damage. Assessing and addressing wind damage promptly is vital to ensure the safety of occupants and prevent further deterioration. In this blog, we will explore how to assess wind damage and navigate the aftermath effectively, providing valuable insights and guidance for homeowners.
Safety First
Before assessing any damage, prioritize safety. Make sure the immediate danger has passed and it is safe to enter the premises. Watch out for potential hazards such as downed power lines, unstable structures, or debris. If there are any concerns about the stability of the building, evacuate immediately and seek professional assistance.
Exterior Assessment
Begin by conducting an exterior assessment of your property. Look for visible signs of wind damage, including:
- Roof: Check for missing or damaged shingles, loose or dented flashing, or displaced tiles. Pay attention to any areas where the roof might have lifted or peeled back, as these are vulnerable spots for water intrusion.
- Siding and Facade: Inspect the siding, stucco, or brick facade for cracks, chips, or loosened sections. Strong winds can dislodge siding materials, compromising the structure's integrity and leaving it vulnerable to further damage.
- Windows and Doors: Examine windows and doors for cracks, broken glass, or frames that have pulled away from the structure. Damaged windows and doors can compromise security and lead to water damage if not addressed promptly.
- Exterior Structures: Assess other elements such as fences, awnings, and outbuildings for damage. These structures may have experienced wind stress or could have become projectiles during the storm.
Interior Assessment
Once the external assessment is complete and deemed safe, proceed to inspect the interior of the building. Look for the following signs of wind damage:
- Water Intrusion: Check for signs of water damage, including stains, discoloration, or moisture on walls, ceilings, and floors. High winds can cause gaps in the building envelope, allowing water to enter and potentially lead to mold growth and structural decay.
- Cracks and Shifts: Look for new cracks in walls, ceilings, or floors, as well as any noticeable shifts in the structure. Wind pressure can cause structural elements to move, leading to cracks or gaps that compromise stability.
- Damaged Electrical Systems: Assess the electrical system for any visible damage, such as exposed wires, broken outlets, or non-functioning fixtures. If you suspect any electrical damage, seek professional assistance and refrain from attempting to fix it yourself.
Engage Professionals
For a comprehensive assessment of structural wind damage, it is essential to engage professionals. Turn to trained experts who can assess the severity of the damage and provide guidance on necessary repairs.
- Structural Engineers: Consult with a structural engineer to evaluate the extent of the damage and provide a detailed assessment. They can determine if the building is structurally sound and recommend appropriate repairs or reinforcements.
- Restoration Professionals: A professional restoration company like SERVPRO® can provide expertise in addressing water damage, mold remediation, and structural repairs. Their skilled technicians can conduct a thorough evaluation of the damage and execute necessary restoration procedures to ensure your home is safe and habitable.
Remember to document all the damage with photographs and detailed notes, as this information will be valuable for insurance claims and the restoration process. By promptly addressing wind damage and seeking support from trusted professionals like SERVPRO, you can protect your property and restore it to its pre-storm condition.
In Conclusion
Assessing wind damage and its aftermath requires a methodical approach and professional expertise. Prioritize safety, conduct a thorough evaluation of the exterior and interior, and engage reputable professionals for guidance. By promptly addressing structural wind damage and following the recommended repairs, you can ensure the safety and integrity of your home with the help of trusted experts like SERVPRO.
How to Handle Smoke Damage to Clothing and Personal Belongings
4/17/2024 (Permalink)
 In this blog, we will explore the steps to remove smoke damage from clothing and personal belongings.
When a fire occurs, the damage caused by smoke extends beyond the structure and can affect personal belongings. Smoke can cling to clothing and other items, leaving behind unpleasant odors and discoloration. Knowing how to effectively handle smoke damage to clothing and personal belongings is crucial for successful fire damage restoration. In this blog, we will explore the steps to remove smoke damage from clothing and personal belongings. By following these tips, homeowners can restore their valued possessions to their pre-fire condition.
Remove Items from the Affected Area
As soon as it is safe to do so, remove smoke-damaged clothing and personal belongings from the affected area. This prevents further exposure to smoke and minimizes cross-contamination with other items. Take caution to avoid spreading soot and ash throughout the house while relocating the items.
Sort and Prioritize
Sort the smoke-damaged items into different categories based on material types and degree of damage. Prioritize delicate and valuable items that may require specialized cleaning methods. This organization will help streamline the cleaning process and ensure that each item receives the appropriate treatment.
Shake or Vacuum Off Loose Soot
Before attempting any cleaning techniques, gently shake or vacuum off loose soot particles from the surfaces of the clothing and personal belongings. Use a vacuum cleaner with a brush attachment or a soft brush to minimize the risk of causing further damage.
Dry Cleaning for Delicate and Valuable Items
Delicate fabrics, such as silk, wool, or cashmere, often require professional dry cleaning to remove smoke damage safely. Consult a reputable dry cleaning service experienced in handling fire-damaged garments. Inform the specialists about the fire damage beforehand to ensure they apply the appropriate restoration techniques.
Washing Machine for Machine-Washable Items
For machine-washable items, begin by reading the care labels on each garment and following the recommended cleaning instructions. Use a high-quality detergent formulated for removing tough stains and odors. Avoid overcrowding the washing machine to allow for proper agitation and thorough cleaning. Wash the smoke-damaged items separately from unaffected clothing to prevent contamination.
Specialty Cleaning for Non-Washable Items
Certain items, such as leather goods, fur, or delicate accessories, may not be suitable for traditional washing methods. Consult with professionals who specialize in restoring such items. They possess the expertise and equipment necessary to clean and restore non-washable items, ensuring they are free from smoke damage and odors.
Ozone Treatment for Lingering Odors
Persistent smoke odors can be challenging to eliminate, especially from porous materials. Ozone treatment is a highly effective method that uses ozone (O3) gas to neutralize the odors at the molecular level. This process should only be performed by professionals experienced in ozone treatment to ensure safe and proper application.
Handling smoke damage to clothing and personal belongings requires careful attention and proper techniques. By promptly removing items from the affected area, sorting and prioritizing, and employing appropriate cleaning methods, homeowners can restore their valued possessions to their pre-fire condition. Dry cleaning, machine washing, specialty cleaning, and ozone treatment are effective strategies for dealing with smoke damage. For a seamless and successful fire damage restoration process, consider seeking professional assistance from certified experts like SERVPRO®. They have the knowledge, experience, and resources to handle smoke damage to clothing and personal belongings, ensuring thorough restoration and peace of mind.
How Water Damage and Mold Go Hand in Hand
3/15/2024 (Permalink)
 Understanding this dynamic duo is key to addressing water damage promptly and mitigating the risk of mold growth in your home.
Water damage in residential settings is more than just an inconvenience; it often brings an unwelcome companion — mold. In this blog, we'll delve into why residential water damage and mold seem to go hand in hand, shedding light on the interconnected issues that homeowners may face. Understanding this dynamic duo is key to addressing water damage promptly and mitigating the risk of mold growth in your home.
1. Moisture as the Catalyst
Water damage creates the ideal breeding ground for mold by introducing excess moisture into the equation. Whether it's a burst pipe, roof leak, or flooding, the lingering moisture becomes a catalyst for mold spores to thrive and multiply.
2. Timing is Everything
Mold is opportunistic and swift, often appearing within 24 to 48 hours after water damage occurs. The quick onset of mold growth highlights the urgency of addressing water damage quickly to prevent a potential mold infestation.
3. Hidden Havens for Mold
Water damage doesn't just affect visible surfaces; it can seep into hidden nooks and crannies, under flooring and behind walls, providing secluded areas for mold to grow. This makes it essential to thoroughly assess and address water damage to prevent mold from establishing hidden colonies.
4. Material Matters
Certain building materials, such as drywall and insulation, are particularly susceptible to water absorption. Once saturated, these materials become a breeding ground for mold. Understanding the materials in your home and their vulnerability to water damage is crucial in preventing mold issues.
5. Neglected Spaces
Areas that often go unnoticed, like basements, crawl spaces, and attics, are more susceptible to water damage and subsequent mold growth. Regular inspections of these neglected spaces can help identify and address water damage before mold has a chance to take hold.
6. Humidity Amplifies Mold Risk
After water damage occurs, the residual humidity in the air can further amplify the risk of mold growth. Adequate ventilation and dehumidification are essential in reducing humidity levels and mitigating the potential for mold infestation.
7. DIY Cleanup Risks
While DIY water damage cleanup may seem cost-effective, improper drying and cleaning techniques can leave lingering moisture, setting the stage for mold growth. Professional water damage restoration services ensure thorough and effective cleanup, minimizing the risk of subsequent mold issues.
8. Continuous Monitoring
Even after water damage is addressed, continuous monitoring is crucial. Regular checks for signs of mold growth, such as musty odors or visible patches, can help catch potential issues early and prevent widespread infestation.
Understanding the relationship between residential water damage and mold empowers homeowners to take proactive steps to protect their homes. Prompt attention to water damage, thorough cleanup, and ongoing monitoring are key elements in breaking the cycle and maintaining a mold-free living environment.
Be Prepared and Stay Safe: Earthquake Preparedness Guide
2/21/2024 (Permalink)
Earthquakes are unpredictable natural disasters that can strike without warning, causing widespread damage and posing a significant threat to human lives and infrastructure. Whether you reside in Bel Air, CA, or not, being prepared for earthquakes is essential to protect yourself, your loved ones, and your property. In this blog post, we will provide a comprehensive earthquake preparedness guide to help you understand the necessary steps to take before, during, and after an earthquake, to ensure your safety and peace of mind.
Create an Emergency Plan
Developing a well-thought-out emergency plan is the cornerstone of earthquake preparedness. Discuss with your family or household members the safest places to take cover during an earthquake, both indoors and outdoors. Identify an assembly point outside your home where everyone can gather after the shaking stops. Assign specific responsibilities to each family member, such as contacting emergency services or turning off utilities. Regularly review and practice your emergency plan to ensure everyone knows what to do when the ground starts shaking.
Secure Your Living Space
Take preventive measures to secure your living space, making it as safe as possible during an earthquake. Anchor heavy furniture, bookcases, and appliances to the wall to prevent them from toppling over. Use childproof latches to secure cabinet doors and ensure hazardous materials and objects are stored safely. Consider installing flexible gas and water connectors to minimize the risk of leaks and subsequent hazards. By securing your living space, you reduce the chance of injuries and property damage during an earthquake.
Build an Emergency Kit
Assemble a well-stocked emergency kit that includes essential supplies to sustain you and your family for at least three days. Your kit should include non-perishable food items, drinking water, a first aid kit, flashlights, batteries, a portable radio, a whistle, a multi-tool, cash, important documents, and any necessary medications. Store the kit in an easily accessible location and periodically check and replenish its contents. Having an emergency kit ready will ensure you have the necessary supplies during the immediate aftermath of an earthquake.
Educate Yourself and Others
Knowledge is key to effective earthquake preparedness. Learn about the specific earthquake risks in your area and understand how to receive emergency notifications and alerts. Educate yourself and your family about earthquake safety measures, such as "Drop, Cover, and Hold On" during an earthquake. Teach children what to do and where to go in the event of an earthquake. Share your knowledge with friends, neighbors, and coworkers to promote earthquake preparedness in your community.
Review Insurance Coverage
Review your insurance policies, including homeowner's or renter's insurance, to understand the coverage they provide for earthquake-related damages. Consider purchasing earthquake insurance if it is not already included in your policy. Evaluate the coverage limits and deductible amounts to ensure they meet your needs. Keep important insurance documents and policy information in a secure location that is easily accessible after an earthquake.
Earthquake preparedness is a responsibility we all share, regardless of where we live. By creating an emergency plan, securing your living space, building an emergency kit, educating yourself and others, and reviewing insurance coverage, you can significantly enhance your preparedness for earthquakes. Remember to stay informed about earthquake risks in your area and regularly update your emergency plan and supplies. Taking these proactive steps will help protect you and your loved ones, ensuring your safety and resilience in the face of seismic events.
The Role of a Resilient Roof in Protecting Your Property
1/16/2024 (Permalink)
 Your roof serves as the first line of defense, shielding your property from harsh weather conditions.
Your roof serves as the first line of defense, shielding your property from harsh weather conditions such as heavy rains, strong winds, hailstorms, and more. Understanding the significance of a durable roof is important, especially when considering the unpredictable nature of weather-related challenges.
The Importance of a Resilient Roof
1. Protection Against Weather Elements
A robust roof is crucial in safeguarding your property and its inhabitants against various weather extremes. It shields against rain, preventing water leaks that can lead to structural damage, mold growth, and compromised integrity.
2. Wind Resistance
Strong winds accompanying storms can wreak havoc on roofs, causing shingles to lift or even tear off entirely. A resilient roof structure and quality roofing materials can resist wind damage, minimizing the risk of structural compromise.
3. Hail Damage Mitigation
Hailstorms can pose a significant threat to rooftops, often causing dents, cracks, or punctures in roofing materials. A durable roof built with impact-resistant materials can withstand hail damage more effectively.
Maintaining Roof Resilience
1. Regular Inspections
Schedule routine roof inspections by certified professionals to detect and address any issues promptly. Identify loose shingles, signs of wear and tear, or areas prone to leaks.
2. Timely Repairs and Maintenance
Address minor damages promptly to prevent them from escalating into more significant issues. Repair loose or damaged shingles, flashing, or gutters to maintain the roof's integrity.
3. Invest in Quality Materials
When replacing or installing a new roof, invest in high-quality materials designed to withstand the local climate and weather conditions. Consult with roofing experts to choose the best materials for resilience and longevity.
Responding to Storm Damage
Despite precautions, storms may sometimes cause unforeseen damage to even the most resilient roofs. In such cases:
- Safety First: Ensure personal safety and assess the extent of damage from a safe vantage point. Avoid climbing onto a damaged roof.
- Document the Damage: Take photographs or videos to document the damage for insurance claims. This will also aid professionals in accurately assessing the repair needs.
- Professional Assistance: Contact certified roofing professionals to conduct a thorough assessment and carry out necessary repairs or replacements.
A resilient roof is an invaluable asset in protecting your property from the wrath of nature's unpredictability. Regular maintenance, timely repairs, and investing in quality materials are key to ensuring your roof remains robust against various weather challenges. However, in the event of storm-related damage, entrust the restoration and repair process to experienced professionals like SERVPRO of Bel Air/West Hollywood.
How to Prevent Bacterial Growth After a Water Leak
12/13/2023 (Permalink)
While Bel Air, CA, is known for its luxury and elegance, no home is immune to water leaks. Beyond the visible damage, water can create an environment conducive to bacterial growth, posing several potential risks. In this blog, we'll explore essential tips to prevent bacterial growth after water intrusion in your Bel Air home.
Understanding the Bacterial Threat
When water enters your home, it can introduce various bacteria and pathogens. Bacterial growth is not only unsightly but can also lead to several issues. Common bacteria found in water-damaged areas include E. coli, Salmonella, and mold-related bacteria. Preventing them is crucial.
Key Steps to Prevent Bacterial Growth
Safety First
Before addressing bacterial growth, ensure your safety. Turn off electrical power if necessary and wear appropriate protective gear, especially when dealing with contaminated water.
Prompt Cleanup
Time is of the essence. Begin the cleanup process as soon as possible to minimize the chances of bacterial growth. Remove standing water and moisture promptly.
Remove Wet Materials
Bacteria can thrive in porous materials like carpeting, drywall, and insulation. If these materials are saturated, they should be removed to prevent bacterial colonization.
Thorough Drying
Proper drying is critical. Use fans, dehumidifiers, and open windows to ensure thorough ventilation and drying of affected areas. Moisture promotes bacterial growth.
Disinfection
Use appropriate disinfectants on cleaned surfaces to kill bacteria. Follow manufacturer instructions and ensure surfaces are thoroughly disinfected.
Monitor Humidity Levels
Maintaining low humidity levels in your home is essential. Bacteria thrive in high-humidity environments. Invest in a hygrometer to monitor humidity levels and use dehumidifiers if needed.
Inspect for Mold
Mold is a common byproduct of water intrusion and can host harmful bacteria. Regularly inspect for mold growth and address it promptly.
Ventilation
Proper ventilation is crucial to preventing bacterial growth. Ensure good airflow within your home, especially in areas prone to moisture, like bathrooms and kitchens.
Professional Assistance
While these steps are essential for preventing bacterial growth after water intrusion, it's often wise to seek professional assistance. SERVPRO® of Bel Air/West Hollywood specializes in water damage restoration, including the prevention of bacterial growth. Our trained technicians have the expertise and equipment to handle water damage effectively, ensuring your home is not only dry but also free from harmful bacteria and pathogens.
In Bel Air, CA, safeguarding your home's cleanliness and comfort means addressing water intrusion promptly and effectively. Preventing bacterial growth is an essential part of the process. Whether you choose to tackle the cleanup yourself or seek professional assistance, prioritizing safety and thorough drying is key. SERVPRO® of Bel Air/West Hollywood is here to support our community, providing expertise and services tailored to your unique needs. Remember, when it comes to water damage and bacterial prevention, acting swiftly is your best defense.
When to Change Smoke Alarm Batteries
11/20/2023 (Permalink)
Smoke alarms are essential devices that provide early warning of potential fires in our homes. To ensure their reliable operation, it is crucial to regularly maintain and replace the batteries. But
how often should you change smoke alarm batteries? In this blog post, we will discuss the importance of maintaining functional batteries in smoke alarms and provide guidelines on when to replace them, allowing you to maintain optimal fire safety in your home.
Follow Manufacturer Recommendations
The first step in determining when to change smoke alarm batteries is to refer to the manufacturer's instructions. Different smoke alarm models may have specific recommendations regarding battery replacement. These instructions typically include information on battery types, lifespan, and replacement intervals. Familiarize yourself with these guidelines to ensure you are following the manufacturer's recommendations for your particular smoke alarm.
Replace Batteries Annually
As a general rule of thumb, it is advisable to replace smoke alarm batteries at least once a year. A good practice is to select a specific date, such as when you change your clocks for daylight saving time, to serve as a reminder to replace the batteries in all your smoke alarms. By doing this annually, you can maintain the reliability of your smoke alarms and minimize the risk of battery failure.
Test Smoke Alarms Regularly
Apart from annual battery replacement, it is important to test your smoke alarms on a regular basis to ensure they are functioning correctly. Most smoke alarms have a test button that allows you to check if the alarm sounds properly. Ideally, you should test your smoke alarms once a month. If the alarm does not sound when tested, replace the battery immediately.
Consider Long-Life Batteries
In addition to traditional disposable batteries, consider using long-life or lithium batteries in your smoke alarms. Long-life batteries typically have a lifespan of up to 10 years, eliminating the need for annual battery replacements. However, it is still crucial to test these smoke alarms regularly to ensure they are functioning correctly.
If your smoke alarm emits a low-battery warning beep, replace the batteries promptly. Do not ignore or disable the warning sound, as it is a vital reminder that the batteries need to be changed. Delaying battery replacement increases the risk of the smoke alarm failing to function during an emergency, jeopardizing the safety of your household.
If a smoke alarm frequently gives false alarms or malfunctions, even after replacing the batteries, it may be time to replace the entire unit.
If the smoke alarm is more than 10 years old, consider replacing it with a new model, as older units may not meet current safety standards.
Maintaining functional batteries in your smoke alarms is crucial for reliable fire safety in your home. By following the manufacturer's recommendations, replacing batteries annually, testing smoke alarms regularly, and promptly addressing low-battery warnings, you can ensure that your smoke alarms are in optimal working condition. By prioritizing the maintenance of your smoke alarms, you are taking proactive steps to protect yourself, your loved ones, and your home from the devastating effects of fires.
Mold Removal Safety: Protecting Your Employees in the Workplace
6/8/2023 (Permalink)
Mold is a fungus that grows in damp areas, such as bathrooms and basements. It's important to make sure your employees are safe during mold removal.
If you have any questions about this guide or would like more information on how we can help with your business needs.
Mold Removal Safety Tips
- Wear protective gear.
- Use proper ventilation.
- Utilize professional help, if necessary
- Create a Safe Environment
Create a safe environment
Identify problem areas. Look for the places in your office where mold is likely to grow, such as bathrooms and kitchens. Contain the mold. If you can't remove it all at once, try to contain it with plastic sheeting or tape until you have time to come back with proper equipment and supplies (see below).
Use the right cleaning materials
Be sure that whatever products you use are safe for people who may be sensitive to chemicals like bleach or ammonia-based cleaners; you can also use an alternative product like vinegar instead of bleach when cleaning up after a major spillage of water from flooding and rain
Take Precautions
To ensure your employees' safety, you should:
- Train your employees on the proper safety procedures for mold removal. They should know how to test the air quality and provide proper ventilation.
- Make sure that everyone wears protective gear when working around moldy areas of the building. This includes goggles and gloves made from natural materials like cotton or latex (not synthetic materials like nitrile).
Monitor Progress
In addition to checking for signs of mold growth, you should also check the air quality regularly. You can do this by using an inspection checklist and testing it at least once a month. It's important that you keep track of any changes in your building's environment so that if there is an issue with mold growth, you can address it quickly.
Provide Personal Protective Equipment (PPE)
You should have a supply of disposable or washable coveralls, gloves and face masks for workers to use during the removal process. If you are using respirators, make sure they are properly fitted and maintained according to manufacturer's instructions.
Follow OSHA Guidelines
If you're a small business owner, it may be tempting to skip the safety precautions and save money by doing the job yourself. However, this can have serious consequences for your employees and the future of your company. Provide training on how to handle these materials safely before starting any work involving them--and make sure everyone follows those instructions!
Dispose of Contaminated Materials Properly
If you're going to be removing mold and other contaminants from the workplace, it's important to know how to dispose of them properly. Molds and other fungi can be dangerous if they're not handled correctly--and even more so when they're allowed to spread throughout your building.
Prevent Future Mold Growth
Clean and dry damp areas. Use dehumidifiers to remove excess moisture from the air, especially in rooms that have been flooded or have had standing water for more than 48 hours. Repair any water leaks in your home or office building as soon as possible, if you can't repair them yourself, contact a professional plumber who can help fix the problem quickly and safely.
Now that you know the basics of mold removal and how it can affect your employees, it's time to review some safety guidelines. Review your company's safety policies with your employees. This is especially important if there are new regulations in place or if there are any changes from previous years' policies.


 24/7 Emergency Service